Tormach’s PCNC 1100 mill has done a lot of work for us over the last 3 years since we bought it. For the most part, our relationship with it is affectionate. But sometimes it takes a crap on the bed and our love is strained for a while.
The nature of the parts we make (knives) means a lot of inches of toolpath, probably more than other types of parts where greater depths of cut with fewer passes are involved. The 1100 we own does not have an hour counter, a measure of the inches of toolpath executed, or an average spindle load over time. If it did, Tormach would be in a better position to specify service intervals (like car makers do based on distance driven or time). What we have come to learn is that backlash can creep up on you in baffling ways and you need to be prepared for it, preferably preventatively rather than after parts get ruined.
The mill documentation creates the vague notion that the essential guts of the machine can be expected to last for years and years with little or no maintenance. In our manual, for instance, in section 9.5.3 on gibs and slideways, it states, “If you use the oil lubrication system and keep the protective bellows in good shape, the slideways are not normally maintenance items.” And although the manual describes how to check ballscrew bearing backlash and how to adjust the gibs for minimum backlash, it was not at all clear when and why the owner might want to check those values, and no mention of warning signs that backlash in the machine is starting to get out of hand, as it was in our machine, in just under 3 years of use.
So we were like ostriches, heads in the sand, thinking it best to leave the gibs alone for fear of making backlash worse. “The machine is really pretty new; it can’t be needing that adjustment already,” we thought. Same for ballscrew bearings. We never even got out our indicator to do some basic measurements. Tormach hadn’t said we should, so we sort of followed instructions. There are probably many warning signs of backlash, but the most obvious, looking back, was chatter in the table when we did spotting for holes; after we fixed the 6 thou or more backlash, spotting was smooth again. What eventually made us sit up and take notice that something was wrong was when we made a new model knife handle that required flipping the material around the X axis and milling features on the backside that had to line up with front side elements. When you do that, you double error in Y and we had scales that did not align with tangs by about 12 thousandths. Not good.
So finally we got out the indicator, zeroing to a feature on our vacuum fixture. With the indicator zeroed, I happened to push the table hard to the back of the machine (Y axis) and the needle swung a ridiculous amount. We were stunned. One check led to another. A lot of the machine got dismantled to get at the Y ballnut, buried deep under the machine. We ended up fixing several things:
- inspection showed that the Y axis ballnut carrier mounting bolts were slightly loose. We could see oil movement at the joint between the carrier and the saddle when we pushed on the table. So we tightened them (wickedly hard to reach with tools)
- still plenty of backlash in the Y axis when pushing/pulling on the table front to rear. So next we inspected the ballscrew bearing backlash as described in the manual. The outer bearing was found to be pitted and rough. We did not have a new pair to install, so we washed the grease out of the bearing (yes metal bits came out), re-greased, reinstalled and adjusted as best we could.
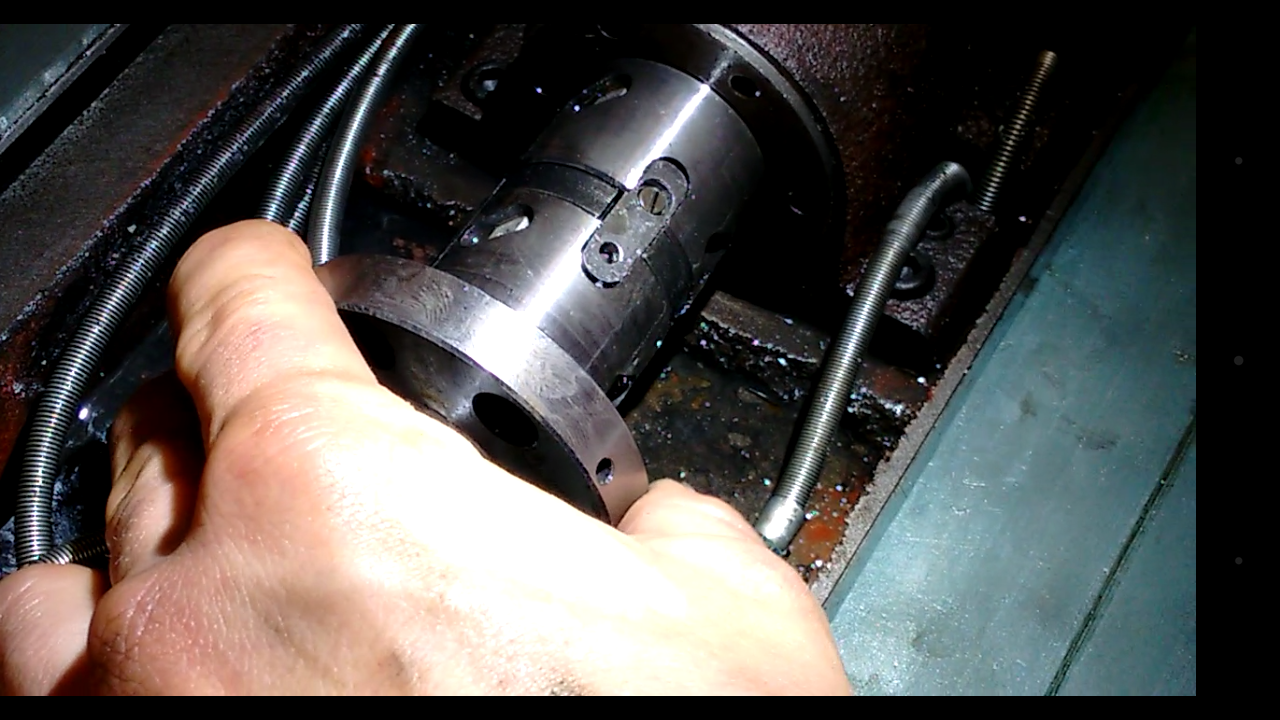
- improved, but still 3-4 thou Y backlash. So now we turned to the dreaded last component, the ballnut. We unbolted it from the carrier and backed it out along the ball screw so we could inspect. We had found the main culprit: backlash between the nut and the screw! The ball nut is built in two halves (ie like jamming locknuts), each of which rides the ballscrew on ball bearings. The halves are tightened toward each other with a steel spacer of just the right thickness to create preload on the balls AND at the same time align a cut-out in each half so the a locking tab can be inserted and screwed down. The end result is that the two halves act like one nut with no backlash with the ballscrew. However, with all the miles of toolpaths we’d run, wear had apparently led to loss of preload in the nut and lots of backlash. We fixed it by removing the spacer, cutting brass shim material to the shape of the spacers (two semicircles that encircle the ballscrew). We tried a couple of shim thicknesses until we had the ballnut halves snug together with the locking tab in alignment and no backlash. After Y was all back together our backlash was down to about .001-.0015 (this was with probable lost motion due to that pitted ballscrew bearing)! Huge relief! It has been running for about 3 months since that fix and backlash has not increased. So we know that the ballscrew/nut assembly is serviceable. Out of interest, I mentioned that repair to Tormach tech support next time I had them on the phone and my contact had clearly not heard of this, nor did he seem familiar with these innards of the machine. I asked for written procedures to replace the pair of ballscrew bearings, and, if ever needed, the ballscrew/nut assembly (which Tormach sells). There are no such docs (or weren’t at that point in Feb/Mar 2016).
- we later tackled the X axis (much easier to get at) and found the ballnut loose there as well. We have not tackled Z yet.
- we also adjusted X and Y gibs for completeness since there is potential that, for example, Y axis backlash can appear if the ways the table slide on in X are loose. Each axis has a long tapered parallelogram bar (a wedge shaped bar) with a bolt on the wide end pushing the wedge tighter against the ways and a bolt at the other end to push the wedge back out. Adjusting the gibs is done pretty much as described in the manual, where you set up a dial indicator, back the gibs wedge out so the axis is very free, then tighten the wedge gradually, checking backlash each time, until you see backlash start to increase (good idea to run the oiler before you start). We set our jog controller to .0005 steps and tested backlash by moving in one direction till the indicator moved a few thou, then stepped back until we saw the needle move. It seems very possible to have the 1100 backlash tuned so that X and Y have under .001 backlash.
Tormach does warn you in their documentation that you as the owner will have to be your own service technician, which is ok, but as the engineers of a complex system we would expect them to at least be able to provide expert guidance in DIY maintenance and repair, including written procedures/bulletins for all the parts they sell. Our recent experience is that tech support is hard to reach and do not return our voicemails or emails most of the time. Perhaps it’s because our machine is older and we get less priority. But if you need to buy a $700 ballscrew/nut assembly, they should be able to tell you how to install it, regardless of how old the machine is.
To date we have not observed spindle run-out issues, but it’s another area we will soon be proactively looking at. Our spindle loads are generally light, and we’ve not had a related breakdown or spindle bearing roughness, but we’d be happy to hear from anyone who has had run-out or preload loss issues and how they showed themselves. We welcome comments.
So, the bottom line to this article is simply that you make time to measure backlash on your Tormach PCNC 1100 periodically and if you see more than .0015-.002 inches you should get your courage up and find out why.
Leave a Reply